Iron Man Jarvis Defense Protocol
MCU JARVIS AI security activation
Tesla calls it Boombox. Three steps, no app, no subscription. Check your car first, then follow the steps below. Installing from your phone?
Check my car
Will it work on your Tesla? Pick a model and a model year.
Needs the external speaker (Model 3 from Sept 2019, S/X from the 2021 refresh) and software 2023.44+.
Check first: does Toybox → Boombox → Lock Sound exist in your car?
Copy to USB
Download your sound. Every file arrives named LockChime.wav in 44.1 kHz, 16-bit WAV, the recommended spec for clean playback. On a FAT32 or exFAT USB drive, create a folder named Boombox and place LockChime.wav inside it. Full path: Boombox/LockChime.wav. The only hard Tesla requirement is a WAV file named LockChime.wav.
Library downloads and voice generator clips both arrive already named, so there is nothing to rename.
To format: on macOS, Disk Utility → Erase → MS-DOS (FAT); on Windows, right-click the drive → Format → FAT32. Any size works, even 64 MB.
Boombox takes a capital B. No subfolders: place LockChime.wav directly inside Boombox/, one file at a time.
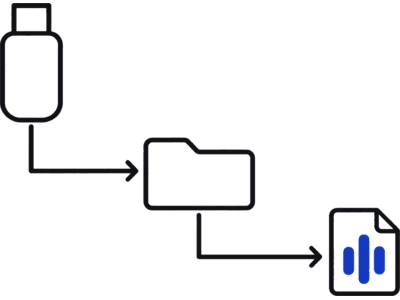
Plug into your Tesla
Insert the drive into a USB port that carries data (the glovebox port on newer cars; rear ports only charge). Give the car a few seconds to index the drive. Open Toybox → Boombox → Lock Sound, then choose USB.
If the first port does not show USB in the menu, try another data port.
Lock the car
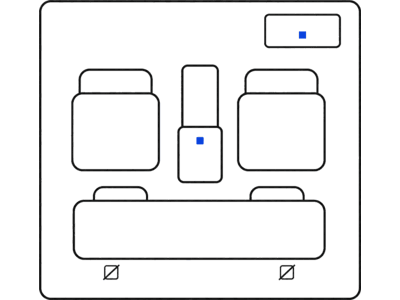
Lock the car to hear it.
Walk away or press the key fob. The sound plays through the external speaker.
Five problems, listed by what you see or hear. Still stuck? The full troubleshooting guide. Quiet after an update? The quiet-after-an-update guide.
Already set up and want a different sound, or none at all? How to change your Tesla lock sound · How to disable or turn off your Tesla lock sound.
After an update: Custom lock sound stopped working? See the fix
The 8 most-downloaded picks from 2,290+ free WAVs. Preview one, then use the steps above to install it.
MCU JARVIS AI security activation
Steven He viral exhale
classic PC farewell
classic game-over jingle
USS Enterprise bridge computer lock-in
iconic ta-dum streaming startup stinger
NBC 1982 AI supercar scanning sweep
John Williams Hogwarts arrival motif
Lock sounds go in Boombox/LockChime.wav. Wrap PNGs go in Wraps/ on that same drive.
tesla-wrap.design is a free browser studio for Paint Shop wrap PNGs. Export the PNG and copy it into Wraps/. In the car, open Toybox → Paint Shop → Wraps.
Confidence levels are conservative and source-linked.
| Model | Years | Confidence | Install path | Notes | Sources |
|---|---|---|---|---|---|
| Model Y | 2025+ (Juniper) | Confirmed | Standard LockChime USB path. Test both data ports if USB does not show first try. | Owner docs and Model Y install walkthrough agree on the same Boombox flow. | S3, S7 |
| Model Y | 2020-2024 | Confirmed | Standard LockChime USB path. | Boombox path documented; aligns with active install guides. | S2, S7 |
| Model 3 | 2024+ (Highland) | Confirmed | Standard LockChime USB path. Use a port that carries data. | Owner docs support Boombox on current Model 3 platform. | S1, S7 |
| Model 3 | Sept 2019-2023 | Likely | Standard LockChime USB path; expect port-behavior variance by build date. | Older docs and field reports are mostly positive but not uniform across trims/markets. | S8, S7 |
| Model S | 2021+ (refresh) | Confirmed | Standard LockChime USB path. | Current docs and model-specific guidance align on Boombox support. | S4, S7 |
| Model X | 2021+ (refresh) | Confirmed | Standard LockChime USB path. | Boombox documented for current Model X generation; matches install guides. | S5, S7 |
| Cybertruck | 2024+ | Confirmed | Standard LockChime USB path. | Owner docs include the same Boombox customization path. | S6, S7 |
| Model S / Model X | 2012-2020 (before the refresh) | Unknown | Check Boombox in-car before USB prep. | Custom lock sounds need the external speaker, which Tesla lists from the 2021 refresh. Older cars are not confirmed either way, so check Toybox → Boombox → Lock Sound first. | S4, S5 |
| Model 3 | Before Sept 2019 | Unknown | Check Boombox in-car before USB prep. | Early builds may lack the external speaker. Check Toybox → Boombox → Lock Sound first. | S8 |
| Roadster (original) | 2008-2012 | Unsupported | No LockChime USB path. | Roadster docs do not include the Boombox/Toybox lock sound workflow. | S9 |
Unknown is not a hard no. If your row is unknown, run the same USB checklist first, then use the troubleshooting sequence before you assume your car is unsupported.
Last verified: 17 Apr 2026.
Format a USB drive as FAT32 or exFAT, create a folder named Boombox, and place your WAV file inside named exactly LockChime.wav. Plug the USB into a USB port that carries data (the glovebox port on newer cars) on your Tesla, and open Toybox → Boombox → Lock Sound, then choose USB. Check first: does Toybox → Boombox → Lock Sound exist in your car?
For Model Y 2026, place LockChime.wav at Boombox/LockChime.wav on a FAT32 or exFAT drive, insert it into a USB port that carries data (the glovebox port on newer cars; rear ports only charge), and open Toybox → Boombox → Lock Sound, then choose USB. If your drive's plug doesn't fit the port, use a small adapter.
Custom lock sounds need the car’s external pedestrian-warning speaker (Model 3 built September 2019 or later, Model S and Model X from the 2021 refresh, every Model Y and Cybertruck) and software 2023.44 or later. Legacy years vary by hardware. Use the model/year install-confidence matrix on this page for confirmed, likely, unknown, and unsupported status before you prep your USB drive.
Unknown means we could not verify a model/year path with current primary documentation or consistent field reports. It does not mean 'impossible.' Start with the standard Boombox/LockChime.wav checklist, then use the troubleshooting flow if USB does not appear.
Tesla needs a WAV file named exactly LockChime.wav. We recommend 44.1 kHz, 16-bit PCM, inside a Boombox folder on a FAT32 or exFAT USB drive. Keep files 1–5 seconds. All 2,290+ sounds on Tesla Lock Sound are pre-converted to this exact format.
In almost every case, one of four things is wrong: the USB format (must be FAT32 or exFAT), the folder path (must be Boombox/LockChime.wav), the filename capitalization (must be exactly LockChime.wav), or the USB port (it has to carry data).
Tesla usually falls back to its default sound when one setting or file detail is off. Confirm Lock Sound is set to USB, confirm the path is Boombox/LockChime.wav, confirm the filename is exactly LockChime.wav, then reinsert the USB drive and lock once to retest. If it still plays the default, try the file at the top level of the drive instead; both locations work.
Tesla lock sounds should be 1–5 seconds. Longer sounds may be cut off, so trim them in the converter first.
Yes. Use the free LockChime.wav converter to trim any MP3, M4A, or WAV to 5 seconds and export it in the correct format. Runs in-browser, no upload needed.
No. Tesla reads one LockChime.wav at a time. To swap sounds, replace the file on the USB drive.
All files use the recommended format (44.1 kHz, 16-bit WAV). As with any vehicle modification, use at your own discretion.
Yes. Custom lock sounds play when you lock via the app, key fob, or walk-away auto-lock.
The library opens on the most-downloaded. Setup takes about 2 minutes.